My niece just turned 9, which I can't even believe is possible - how is she growing so fast?!? In my mind she's still my little Livy-bug, but in reality, she's old enough to have an Instagram-worthy, hashtag-ready, rainbows & unicorns themed birthday party. Seriously, this girl needs to be introduced to an old friend of mine named Lisa Frank ;)
I decided to crochet her a pillow - something she can snuggle up to while reading, or cozy up with watching tv. I have had this awesome pattern saved on my Pinterest for quite a while now, just knowing it would come in handy. It was super easy & it worked up quickly, I was pleasantly surprised :) I even had it done before we went on vacation, a whole month before the birthday!
You can see I did a sleepy eye, instead of a hard plastic one, so it would be a bit cozier. I also did the mane differently - as much as I just LOVE the one in the original picture, I wasn't thrilled with how it was turning out as I crocheted it... so I just used a rainbow yarn and made a fringe trim along the top & back of the unicorn's head (I cut a guhzillion pieces of yarn then gathered 3 together, folded them in half, and used my crochet hook to pull them through the edge stitches & knot them in place).
I think it was a hit - when she opened the bag (which I also crocheted - that post will be coming sometime) she let out a squeal and jumped up to give me a hug. That, of course, is my favorite part of crocheting for my family & friends ;) And, my sister texted me that my niece has requested a blanket, so... we shall see where the inspiration takes me, on that!
Sunday, July 29, 2018
Thursday, May 31, 2018
All You Need Is Love...
Y'all. Y'all! I know I say this all the time, but this time it's for reals - this is my FAVORITE thing I've ever made (aside from my sons' baby blankets, naturally). This project was super fun, the yarn was a joy to work with, and the whole concept of it was a new thing for me to try. So, I am so happy to present to you my niece's birthday present, The Beatles Blanket:
My niece is turning 6 on Monday, and thanks to the show "Beat Bugs," she is a huge Beatles fan. Enough of a fan, in fact, to have a Beatles themed birthday party! She decided this far enough in advance that I was confident I could finish a (small) project in time, and I started searching online for a project. Of course, I just couldn't find anything that really called to me. Lots of Sgt. Pepper amigurumi stuff, but... honey, no... I felt myself moving in the direction of a blanket to snuggle up with, but I couldn't find any great patterns. So, I drew inspiration from a picture I saw online, and I came up with a pattern I could turn into a graphgan (afghan made from a graphed pattern, where 1 block = 1 stitch).
Keeping with the Beatles theme, I picked a psychedelic-looking yarn for the words, and a super soft grey for the background. Even though it can look intimidating at first, a graphgan is actually super easy - you just carry the non-working yarn along inside the stitches, and switch back-and-forth whenever the chart tells you to. Depending on which stitch you use, you may need to do TWO stitches for each block on the graph (i.e., in sc, 1 stitch is accurate, but hdc, dc, or even tc will really skew your results - I did this blanket in all hdc, which is why mine is taller & narrower than the graph.), but other than that, it's quite straightforward. The only important thing to remember is to always hold the "secret" yarn towards the back of the picture, so that it doesn't show through on the front side. You can definitely see some spots where I got lazy with that (particularly the bottom left side), and I tried to pay more attention to that as I went on.
Once I had the graphed portion of the blanket done, I went around the whole thing with single crochet, then did a second round in dc. This made a nice, uniform border, and also helped restore the blanket to a more squared shape, after it got wonky from being handled so much.
I'm really hoping my niece likes this blanket. In true almost-6-years-old fashion, she changed her mind about a week ago & requested a gymnastics party (though my sister did me a solid & merged the two), but she still loves the Beatles & neon colors ;) Either way, this project was fun & a big step for me into trying new techniques!
My niece is turning 6 on Monday, and thanks to the show "Beat Bugs," she is a huge Beatles fan. Enough of a fan, in fact, to have a Beatles themed birthday party! She decided this far enough in advance that I was confident I could finish a (small) project in time, and I started searching online for a project. Of course, I just couldn't find anything that really called to me. Lots of Sgt. Pepper amigurumi stuff, but... honey, no... I felt myself moving in the direction of a blanket to snuggle up with, but I couldn't find any great patterns. So, I drew inspiration from a picture I saw online, and I came up with a pattern I could turn into a graphgan (afghan made from a graphed pattern, where 1 block = 1 stitch).
Keeping with the Beatles theme, I picked a psychedelic-looking yarn for the words, and a super soft grey for the background. Even though it can look intimidating at first, a graphgan is actually super easy - you just carry the non-working yarn along inside the stitches, and switch back-and-forth whenever the chart tells you to. Depending on which stitch you use, you may need to do TWO stitches for each block on the graph (i.e., in sc, 1 stitch is accurate, but hdc, dc, or even tc will really skew your results - I did this blanket in all hdc, which is why mine is taller & narrower than the graph.), but other than that, it's quite straightforward. The only important thing to remember is to always hold the "secret" yarn towards the back of the picture, so that it doesn't show through on the front side. You can definitely see some spots where I got lazy with that (particularly the bottom left side), and I tried to pay more attention to that as I went on.
Once I had the graphed portion of the blanket done, I went around the whole thing with single crochet, then did a second round in dc. This made a nice, uniform border, and also helped restore the blanket to a more squared shape, after it got wonky from being handled so much.
I'm really hoping my niece likes this blanket. In true almost-6-years-old fashion, she changed her mind about a week ago & requested a gymnastics party (though my sister did me a solid & merged the two), but she still loves the Beatles & neon colors ;) Either way, this project was fun & a big step for me into trying new techniques!
Wednesday, April 25, 2018
Baby Blanket for the Brussels Sprout
This post has been sitting in my "to post" bin for a bit, because I was waiting til the recipient opened the present at her Baby Shower. And boy, what a fun time that party was! My cousin, who is having a baby in August, lives in Belgium. But the families are scattered, from Colorado to New York, Massachusetts to Maryland... there was no way we were going to be able to get everyone together, right? So, Momma-to-be's sister came up with the idea of a "virtual shower," and It. Was. AMAZING! Everyone shipped their presents overseas in the weeks leading up to the big day (T, how did you ever have the self control for that?!?), then we all gathered at local homes to join in on a shared video call to get to chat & watch the presents be opened. They even shipped decorations to each home & ordered cupcakes from local bakeries - totally genius! I swear, it was one of the best showers I ever "attended," and I was just so impressed with how much love & dedication the Auntie-to-be put into it =D
All of the presents at the shower were wonderful, of course, but in my completely biased opinion, this blanket was my favorite one! I picked a super soft, cozy, cuddly yarn, and worked it up on a nice, fat hook, so the stitches are soft & puffy. And yes, I know that creams/browns aren't traditionally baby colors, but this color scheme just called out to me in the store - you see, my cousin's "happy place" is the New England beach, and this yarn instantly reminded me of the rocky coastline & beautiful beach where she got married :)
This is 3 skeins (minus the couple yards that got so tangled I had to cut it off...) of Bernat Baby Blanket yarn. I've never used this before, because I tend to stick to worsted weight yarns, but once I felt it, I was in love. I can't wait to use it again and again! Because the variegated colors created a pattern naturally, I didn't use any fancy stitch here - just straight rows of hdc. Which was nice, because it worked up quickly & it's easy to do while watching tv, or between chores.
My favorite part of making baby blankets is watching my loved ones enjoy the present - it warms my heart when I see people get excited over something I made! My cousin was super excited, which made me so happy (and it was so cute to watch her snuggle the blanket herself). I can't wait to see her little Brussels Sprout wrapped up in it, too!
All of the presents at the shower were wonderful, of course, but in my completely biased opinion, this blanket was my favorite one! I picked a super soft, cozy, cuddly yarn, and worked it up on a nice, fat hook, so the stitches are soft & puffy. And yes, I know that creams/browns aren't traditionally baby colors, but this color scheme just called out to me in the store - you see, my cousin's "happy place" is the New England beach, and this yarn instantly reminded me of the rocky coastline & beautiful beach where she got married :)
This is 3 skeins (minus the couple yards that got so tangled I had to cut it off...) of Bernat Baby Blanket yarn. I've never used this before, because I tend to stick to worsted weight yarns, but once I felt it, I was in love. I can't wait to use it again and again! Because the variegated colors created a pattern naturally, I didn't use any fancy stitch here - just straight rows of hdc. Which was nice, because it worked up quickly & it's easy to do while watching tv, or between chores.
My favorite part of making baby blankets is watching my loved ones enjoy the present - it warms my heart when I see people get excited over something I made! My cousin was super excited, which made me so happy (and it was so cute to watch her snuggle the blanket herself). I can't wait to see her little Brussels Sprout wrapped up in it, too!
Wednesday, March 28, 2018
Crochet Gingham Blanket
Hee hee, can you tell I'm trying my best to get caught back up with my blogging? 3 posts in a week must be a record for me! Today I am happy to share with you the blanket I crocheted for my newest nephew, born in January. I adore being an Auntie (I have 2 nieces & now 2 nephews!) for many, many reasons, not the least of which is that I have extra kiddos to crochet for. Each one of my buddies has a blanket I made for him/her, and it makes my heart so happy!
This time around, I chose to use the tapestry crochet technique to create a gingham pattern, using white, sage, and forest green yarns. In a nutshell, tapestry crochet just means you create a row of stitches in 2 (or more!) colors by carrying along the color you're not using, hiding it inside the active stitches. So, for example, in that first stripe (left side in the picture above), when I was making the white blocks, I was hiding the sage yarn inside, then when I switched to sage, I tucked the white yarn in each stitch. It is a SUPER easy way to create more complex patterns in your work, without having a guhzillion ends to weave in later.
As always, I started with a solid row of single crochet, to get a good foundation, before I started working in pattern. In this case, I chose to chain 121 stitches to begin, single crocheted in the second chain from the hook and in every chain after, giving me a foundation of 120 stitches. At that point, I began carrying my sage yarn across with me, and I created the blocks of color every 15 stitches (8 blocks x 15 stitches each = 120 stitches total). The secret to getting the smooth transitions is to pick up the next color in the final yarn over of the last stitch of the previous color. Just be sure that you're always pushing the yarn to the back of the work, which will be away from you on odd rows & toward you on even rows, of course. This is especially important at the edges, when you carry the non-dominant yarn up a row. You want all of these visible spots to be on one side, so the front of the finished project is clean, with no tell-tale signs of transitions:
I chose this pattern because my sister-in-law and her family are down home, country living kind of people, and I thought she'd like the aesthetic. But, it actually turned out to be one of MY most favorite things I've ever crocheted, too!
This time around, I chose to use the tapestry crochet technique to create a gingham pattern, using white, sage, and forest green yarns. In a nutshell, tapestry crochet just means you create a row of stitches in 2 (or more!) colors by carrying along the color you're not using, hiding it inside the active stitches. So, for example, in that first stripe (left side in the picture above), when I was making the white blocks, I was hiding the sage yarn inside, then when I switched to sage, I tucked the white yarn in each stitch. It is a SUPER easy way to create more complex patterns in your work, without having a guhzillion ends to weave in later.
As always, I started with a solid row of single crochet, to get a good foundation, before I started working in pattern. In this case, I chose to chain 121 stitches to begin, single crocheted in the second chain from the hook and in every chain after, giving me a foundation of 120 stitches. At that point, I began carrying my sage yarn across with me, and I created the blocks of color every 15 stitches (8 blocks x 15 stitches each = 120 stitches total). The secret to getting the smooth transitions is to pick up the next color in the final yarn over of the last stitch of the previous color. Just be sure that you're always pushing the yarn to the back of the work, which will be away from you on odd rows & toward you on even rows, of course. This is especially important at the edges, when you carry the non-dominant yarn up a row. You want all of these visible spots to be on one side, so the front of the finished project is clean, with no tell-tale signs of transitions:
I chose this pattern because my sister-in-law and her family are down home, country living kind of people, and I thought she'd like the aesthetic. But, it actually turned out to be one of MY most favorite things I've ever crocheted, too!
Sunday, March 25, 2018
Momentos for Christmas
I know most of my posts are about crocheting, but I do enjoy many other crafts as well, and my sewing machine is one of my most prized possessions. It has unfortunately been stuck in storage for 2 years, while we moved out of our townhouse, stayed with my parents for a year, and moved into our new home. My DH just got it out of the storage unit this week, actually, so I can't wait to get it set up... But, in the meantime, I was forced to hand sew any projects I wanted to work on. For the most part, this translated to putting items on the back burner. But, there were two Christmas presents I just knew I wanted to make, for special, sentimental reasons, and I forged ahead without my machine.
As I've discussed, my DH, our 2 sons, and I moved last year, into his Nan's old home. We are SO happy & honored to live in the home she filled with love & wonderful memories for so many years. It's such a blessing to be in our "forever home," establishing those warm & fuzzy experiences for our own family, surrounded by Nan's memory. I wanted to extend that blessed, loved feeling to my husband's family, so I used some of Nan's clothes to create a couple momentos.
The first thing I created was this pillow for my mother-in-law. Using one of Nan's soft, comfy cardigans, I cut squares from the front & the back, being careful to preserve the embroidered pattern, which is just "SO Nan," and the buttons, to keep the look of the shirt. On that front panel, I hand-embroidered a poem:
I also made a teddy bear for my (at the time) nephew-to-be. My sister-in-law was very close with Nan, and took her first son to visit quite frequently. Unfortunately, Nan passed away before this second baby made his appearance. So, I used another one of Nan's cozy shirts to make a memory bear, so Nan's love & snuggles could still be available in at least a little way.
I did not come up with this pattern myself - I used this tutorial, from the PA Country Crafts blog. I've had this pinned for quite awhile, hoping to make bears from each of my boys' "coming home" outfits, so I was very excited to try it out. Let me tell you, it was so easy & simple - even without my machine handy! - that I can't wait to do it again =D This bear turned out exactly how I wanted it to, right down to the floral pattern that reminds us so much of Nan.
As I've discussed, my DH, our 2 sons, and I moved last year, into his Nan's old home. We are SO happy & honored to live in the home she filled with love & wonderful memories for so many years. It's such a blessing to be in our "forever home," establishing those warm & fuzzy experiences for our own family, surrounded by Nan's memory. I wanted to extend that blessed, loved feeling to my husband's family, so I used some of Nan's clothes to create a couple momentos.
The first thing I created was this pillow for my mother-in-law. Using one of Nan's soft, comfy cardigans, I cut squares from the front & the back, being careful to preserve the embroidered pattern, which is just "SO Nan," and the buttons, to keep the look of the shirt. On that front panel, I hand-embroidered a poem:
This is a shirt
Nan used to wear
Whenever you hug it
Know she is there
The easiest way to do this is using water-soluble stabilizer, like this one. You print the design in your regular printer, stick it on the fabric, and embroider it however you like. Then all you do is soak it in warm water & the stabilizer flakes off, leaving you with hand-embroidered fabric. Best. Invention. EVER. Once that was dry, I hand-sewed the two squares together, using a back stitch, to make sure it was sturdy. The best part of this project was that the buttons created a built-in opening to insert the pillow form, so I didn't have to leave a hole to sew up later ;) Easy peasy, and I think it turned out just beautiful.I also made a teddy bear for my (at the time) nephew-to-be. My sister-in-law was very close with Nan, and took her first son to visit quite frequently. Unfortunately, Nan passed away before this second baby made his appearance. So, I used another one of Nan's cozy shirts to make a memory bear, so Nan's love & snuggles could still be available in at least a little way.
I did not come up with this pattern myself - I used this tutorial, from the PA Country Crafts blog. I've had this pinned for quite awhile, hoping to make bears from each of my boys' "coming home" outfits, so I was very excited to try it out. Let me tell you, it was so easy & simple - even without my machine handy! - that I can't wait to do it again =D This bear turned out exactly how I wanted it to, right down to the floral pattern that reminds us so much of Nan.
Tuesday, March 20, 2018
Cluster V-Stich Rainbow Blanket
Lord have mercy, how long has it been since I've posted? 6 1/2 months? Whew! I'm not sure what's gotten into me, because it's certainly not like I stopped crafting. I've made a blanket for my brand new nephew, Colton, holiday gifts for various family members, and some holiday decorations... and I also made this random blanket, for no one in particular, just because an idea struck my fancy.
I was sitting in my office, daydreaming about a crochet project (as I frequently do), and I was hit with the idea that rainbow stripes, alternating with a stark black for contrast, could make for a beautiful blanket! I have always loved rainbow colors. I'm positively sure it's because of my anxiety/OCD - I love colors in the "correct" order, so rainbow stripes just feel good. I frequently find myself drawn to LGBT-pride items, which cracks up my family & friends, but to me that's a win-win, right? ;) So, it's not surprise that my yarn stash already had all of these colors just sitting around, since I use them in so many projects, and I had the black leftover from an ill-fated Disney project (lol).
I wanted a chunkier, more substantial stitch pattern, to hold up to the worsted weight yarn and the bold, primary colors, so I went with a cluster v-stitch. It works up similar to a traditional v-stitch, working into the spaces of the previous row, but each v is made up of a puffy "cluster." It's super simple to do:
Yarn over, insert hook through stitch, yarn over and pull through two loops, leaving two loops on the hook. Yarn over and insert it through the same stitch. Yarn over and pull through two loops, then yarn over again and pull it through 3 loops remaining on hook. Chain 1, then repeat to make the second half of the cluster: yarn over, insert hook through stitch, yarn over and pull through two loops, leaving two loops on the hook. Yarn over and insert it through the same stitch. Yarn over and pull through two loops, then yarn over again and pull it through 3 loops remaining on hook.
I always start my blankets with a row of single crochet. Controversial among crocheters, I know, because most people prefer to start their foundation row in the pattern. But I prefer the sturdier foundation, as well as the easier stitches to work with when I start my pattern. This blanket needs an odd number in the starting chain, so I
settled on 75, for a baby-sized throw. I
single crocheted across, chained 3, and turned my work, before starting my
pattern:
Row 1: DC in first st, *skip 2 chains, Cluster V-stitch in
next chain, repeating from * across, DC in the last stitch.
Join in next color, Chain 3, turn.
Row 2: Cluster V-stitch in each of the Cluster V-stitches from
previous row, DC in last chain of your chain 3. Join in black
yarn, Chain 3, turn.
Continue the pattern, repeating Row 2 & alternating the
colors.
The only tricky part to this was having to weave in all of
those ends when I was done – hoowee, I hate that part! I’m not gonna lie, sometimes I tie knots
(gasp!) and just crochet over them when making the border. But shhh, that’s our little secret… Anyways,
this time, I did it right, then I finished up by adding a black, single
crocheted border down each edge, so the entire blanket is framed by that bold
line.
I really enjoyed this project, because the stitch pattern is lovely but also super simple, and the blanket was done quite quickly. I think this would also look beautiful using just one variegated yarn (which means no ends to weave in!), and I think I'm gonna try that asap! But for now, this is folded & stored in my craft closet, waiting for the right person to give it to :)
Friday, September 8, 2017
Candy Corn Trick-or-Treat Bags
One of my biggest struggles with crochet projects is deadlines. I start a project for a specific event, and then I find myself sitting up til 3:00am the night before, exhausted & fed up, and I usually cut the project short. This has resulted in some smaller-than-normal baby blankets being played off as "car seat blankets," or even an occasional fib about forgetting the present at home...
So, one of the things I've really been trying to be better about is starting projects earlier, and not trying to do too many things at once. For example, I picked just 2 Christmas projects I want to have finished for this year (I have a guhzillion others, but I'm not pressuring myself to have them done for Christmas 2017) and I'm already working on them... and I started these Halloween bags in August! Which is why they're done now, weeks ahead of time, and ready to share with all of you :)
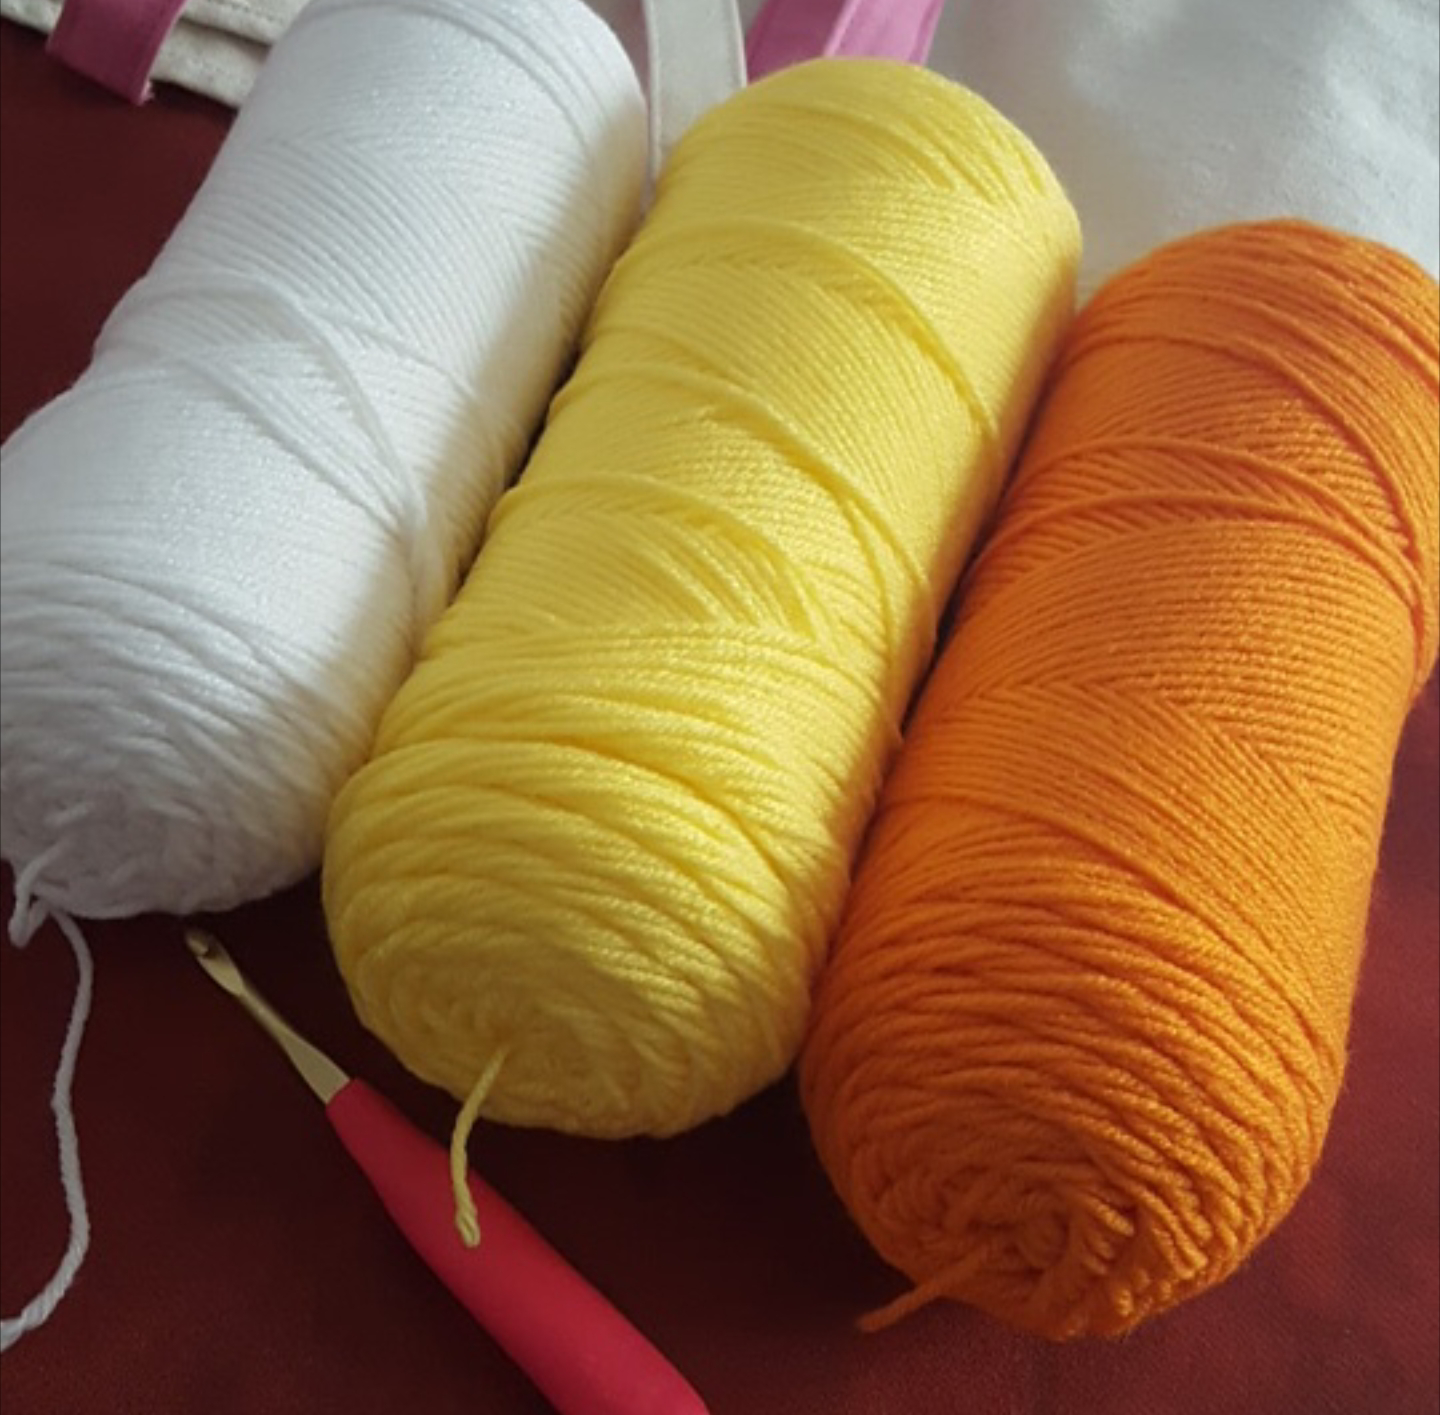
Anyone who knows me knows I'm a #BasicWhiteGirl through and through, and I live for Fall every year! I love the weather, football, Wine Fest, the Great Frederick Fair, pumpkin picking, my son's & my own birthdays, Halloween, bonfires, Thanksgiving... oh, Lawd, I could go on for days! So, even in 90 degree weather in the middle of August, just looking at those Candy Corn colored yarn skeins (Red Heart Super Saver in white, bright yellow, and pumpkin) made me super happy =D
I'm warning you now, I am NOT a professional pattern writer, and I pretty much made this up as I went along, so it's far from perfect. But, if you want to try it out, here's what I did:
These finished bags are not terribly large - the kids are young, and can't carry heavy treat bags, anyways. I'm sure my DH & I will carry a large tote with us, for them to empty into periodically. And, really, am I sad about having a built-in limit for how much candy my kids get? Nope :)
Now I have 5 bags, ready for my boys & their cousins to go Trick-or-Treating next month with an extra festive flare! And I am free to work on my Christmas crafts with complete peace of mind ;)
So, one of the things I've really been trying to be better about is starting projects earlier, and not trying to do too many things at once. For example, I picked just 2 Christmas projects I want to have finished for this year (I have a guhzillion others, but I'm not pressuring myself to have them done for Christmas 2017) and I'm already working on them... and I started these Halloween bags in August! Which is why they're done now, weeks ahead of time, and ready to share with all of you :)
Anyone who knows me knows I'm a #BasicWhiteGirl through and through, and I live for Fall every year! I love the weather, football, Wine Fest, the Great Frederick Fair, pumpkin picking, my son's & my own birthdays, Halloween, bonfires, Thanksgiving... oh, Lawd, I could go on for days! So, even in 90 degree weather in the middle of August, just looking at those Candy Corn colored yarn skeins (Red Heart Super Saver in white, bright yellow, and pumpkin) made me super happy =D
I'm warning you now, I am NOT a professional pattern writer, and I pretty much made this up as I went along, so it's far from perfect. But, if you want to try it out, here's what I did:
Notes: RHSS
yarn, J10 hook, ch2 does NOT count as dc
Triangle (make 2)
White:
•ch 7, dc in 3rd ch from hook & across, ch 2 & turn (5)
•2 dc in first st, dc in each across until 1 remains, 2 dc in last st, ch 2 & turn (7)
•dc in each st across (7)
•2 dc in first st, dc in each across until 1 remains, 2 dc in last st, ch 2 & turn (9)
•dc in each st across (9)
•2 dc in first st, dc in each across until 1 remains, 2 dc in last st, ch 2 & turn (11)
•dc in each st across (11)
•2 dc in first st, dc in each across until 1 remains, 2 dc in last st, ch 2 & turn (13)
•dc in each st across (13)
Join Orange:
•2 dc in first st, dc in each across until 1 remains, 2 dc in last st, ch 2 & turn (15)
•dc in each st across (15)
•2 dc in first st, dc in each across until 1 remains, 2 dc in last st, ch 2 & turn (17)
•dc in each st across (17)
•2 dc in first st, dc in each across until 1 remains, 2 dc in last st, ch 2 & turn (19)
•dc in each st across (19)
•2 dc in first st, dc in each across until 1 remains, 2 dc in last st, ch 2 & turn (21)
•dc in each st across (21)
Join Yellow:
•2 dc in first st, dc in each across until 1 remains, 2 dc in last st, ch 2 & turn (23)
•dc in each st across (23)
•2 dc in first st, dc in each across until 1 remains, 2 dc in last st, ch 2 & turn (25)
•dc in each st across (25)
•2 dc in first st, dc in each across until 1 remains, 2 dc in last st, ch 2 & turn (27)
•dc in each st across (27)
•2 dc in first st, dc in each across until 1 remains, 2 dc in last st, ch 2 & turn (29)
•dc in each st across, fasten off (29)
Holding 2 triangle pieces together, use any color to sl st around side, bottom, side. Fasten off, and turn bag right-side-out.
Join yellow at a seam:
•sc2tog the st before & the st after the seam, 27 sc, sc2tog the st before & the st after the seam, 27 sc, join with sl st in first st (56)
•ch 1, sc in each st around (56)
•ch 1, 9 sc, ch 10 & sk 10 st, 18 sc, ch 10 & sk 10 st, 9 sc, join with sl st in first st (56)
•ch 1 sc in each st around (56)
•ch 1 sc in each st around, fasten off (56)
Triangle (make 2)
White:
•ch 7, dc in 3rd ch from hook & across, ch 2 & turn (5)
•2 dc in first st, dc in each across until 1 remains, 2 dc in last st, ch 2 & turn (7)
•dc in each st across (7)
•2 dc in first st, dc in each across until 1 remains, 2 dc in last st, ch 2 & turn (9)
•dc in each st across (9)
•2 dc in first st, dc in each across until 1 remains, 2 dc in last st, ch 2 & turn (11)
•dc in each st across (11)
•2 dc in first st, dc in each across until 1 remains, 2 dc in last st, ch 2 & turn (13)
•dc in each st across (13)
Join Orange:
•2 dc in first st, dc in each across until 1 remains, 2 dc in last st, ch 2 & turn (15)
•dc in each st across (15)
•2 dc in first st, dc in each across until 1 remains, 2 dc in last st, ch 2 & turn (17)
•dc in each st across (17)
•2 dc in first st, dc in each across until 1 remains, 2 dc in last st, ch 2 & turn (19)
•dc in each st across (19)
•2 dc in first st, dc in each across until 1 remains, 2 dc in last st, ch 2 & turn (21)
•dc in each st across (21)
Join Yellow:
•2 dc in first st, dc in each across until 1 remains, 2 dc in last st, ch 2 & turn (23)
•dc in each st across (23)
•2 dc in first st, dc in each across until 1 remains, 2 dc in last st, ch 2 & turn (25)
•dc in each st across (25)
•2 dc in first st, dc in each across until 1 remains, 2 dc in last st, ch 2 & turn (27)
•dc in each st across (27)
•2 dc in first st, dc in each across until 1 remains, 2 dc in last st, ch 2 & turn (29)
•dc in each st across, fasten off (29)
Holding 2 triangle pieces together, use any color to sl st around side, bottom, side. Fasten off, and turn bag right-side-out.
Join yellow at a seam:
•sc2tog the st before & the st after the seam, 27 sc, sc2tog the st before & the st after the seam, 27 sc, join with sl st in first st (56)
•ch 1, sc in each st around (56)
•ch 1, 9 sc, ch 10 & sk 10 st, 18 sc, ch 10 & sk 10 st, 9 sc, join with sl st in first st (56)
•ch 1 sc in each st around (56)
•ch 1 sc in each st around, fasten off (56)
I worked in an assembly line process :)
These finished bags are not terribly large - the kids are young, and can't carry heavy treat bags, anyways. I'm sure my DH & I will carry a large tote with us, for them to empty into periodically. And, really, am I sad about having a built-in limit for how much candy my kids get? Nope :)
Now I have 5 bags, ready for my boys & their cousins to go Trick-or-Treating next month with an extra festive flare! And I am free to work on my Christmas crafts with complete peace of mind ;)
Wednesday, August 30, 2017
Crochet Cables: my first attempt
As I mentioned before, baby blankets are my FAVORITE projects, hands down. I love how quickly they work up, the soft & snuggly yarn selections, the sweet patterns... and, most of all, I love knowing a sweet little baby is going to be wrapped up in something I poured a piece of my own heart into :)
This latest blanket is no exception - one of my sorority sisters is expecting her first baby next month, and I'm just so excited for her & her wonderful husband! DH & I were lucky enough to attend their wedding a couple summers ago, and even though her life as a military spouse has called her all over the country, she's such a sweet, supportive friend! Oh, and to add an extra level to my excitement? They're waiting for the birth to find out the baby's sex! I love when couples do that (and I'm dying to hear the news!)
I started working on this blanket months ago, almost the same day I heard they were expecting, so I had more time than I usually have to work on it. Because of that, I thought maybe this would be a good opportunity to have some fun & explore some techniques I've been too chicken to attempt - namely, cables. I have approximately a guhzillion cable patterns pinned on my crochet boards, but I've always been too intimidated by them. Like, seriously? There's this one celtic knot border that is stunningly gorgeous... but I just know I don't have the patience to do... but I digress.
Seeing as this project is for a baby blanket, and I really don't want too much texture for little fingers to get stuck in, I decided to try my hand at stripes of simple, 2 strand cables. I used my go-to favorite yarn, Red Heart Super Saver, and I picked camo printed variegated as a nod to the Daddy-to-be's army service (I was hesitant at first, because I didn't want to be hokey, or to seem like I was pigeonholing the baby, but they announced the pregnancy with an ADORABLE camo print onesie, so I figured they'd understand where I was coming from) and since we don't know of it's a boy or a girl :)
These stripes are simply made by making Front Post Double Crochets in a pair of stitches, but doing the second stitch first - thus crossing them over each other to make a braid-like pattern - and "pushing" them to stand out by doing Back Post Double Crochets on the wrong side rows. It was simple to remember, easy to actually do, and a great introduction to cables!
I, of course, added my label on the back (which matches the color scheme this time!) then it was ready to mail to Colorado! Made with love, indeed <3
This latest blanket is no exception - one of my sorority sisters is expecting her first baby next month, and I'm just so excited for her & her wonderful husband! DH & I were lucky enough to attend their wedding a couple summers ago, and even though her life as a military spouse has called her all over the country, she's such a sweet, supportive friend! Oh, and to add an extra level to my excitement? They're waiting for the birth to find out the baby's sex! I love when couples do that (and I'm dying to hear the news!)
I started working on this blanket months ago, almost the same day I heard they were expecting, so I had more time than I usually have to work on it. Because of that, I thought maybe this would be a good opportunity to have some fun & explore some techniques I've been too chicken to attempt - namely, cables. I have approximately a guhzillion cable patterns pinned on my crochet boards, but I've always been too intimidated by them. Like, seriously? There's this one celtic knot border that is stunningly gorgeous... but I just know I don't have the patience to do... but I digress.
Seeing as this project is for a baby blanket, and I really don't want too much texture for little fingers to get stuck in, I decided to try my hand at stripes of simple, 2 strand cables. I used my go-to favorite yarn, Red Heart Super Saver, and I picked camo printed variegated as a nod to the Daddy-to-be's army service (I was hesitant at first, because I didn't want to be hokey, or to seem like I was pigeonholing the baby, but they announced the pregnancy with an ADORABLE camo print onesie, so I figured they'd understand where I was coming from) and since we don't know of it's a boy or a girl :)
These stripes are simply made by making Front Post Double Crochets in a pair of stitches, but doing the second stitch first - thus crossing them over each other to make a braid-like pattern - and "pushing" them to stand out by doing Back Post Double Crochets on the wrong side rows. It was simple to remember, easy to actually do, and a great introduction to cables!
- Ch 111. Hdc in 2nd ch from hook and in each ch across. Ch 2 and turn. (110)
- Hdc in first 6 st. Sk 1 st, fpdc in next st, fpdc in skipped st. *Hdc in next 10, sk 1 st, fpdc in next st, fpdc in skipped st* Repeat from * 7 times. Hdc in remaining 6 st. (110)
- Hdc in first 6 st. Bpdc in the 2 cable stitches from previous row. *Hdc in next 10, bpdc in the 2 cable stitches from previous row* Repeat from * 7 times. Hdc in remaining 6 st. (110)
- Repeat these 2 rows until blanket reach desired length.
I, of course, added my label on the back (which matches the color scheme this time!) then it was ready to mail to Colorado! Made with love, indeed <3
Sunday, August 20, 2017
Behavior Chart
Hey, y'all, you know what's hard? Parenting! Lol, not a news flash, I know, but still... I feel like in some ways, it gets easier as A gets older (like having a helper with his little brother, or letting him get his own yogurt so I can rest 10 extra minutes) but in others, it's getting harder & harder! At almost-5-years old, he has developed quite an attitude, and my DH & I are struggling to help him learn to control his tantrums & express his feelings in acceptable ways.
The majority of the time, A is a sweet, loving, intelligent, funny little guy. He feels his emotions deeply, which is awesome when he's telling us how much he loves us, or how excited he is to visit his cousins... but it's intense when he's frustrated, mad, or hurt. He tends to go straight to kicking/stomping, whining, and crying, without using his words at all. In addition, within the last month or so, he's started a bad habit of back-talking us, AND his teachers! We try to discuss it with him, and that slowly sinks in (I hope), but we definitely decided we needed some tangible consequences to help him learn.
We went with Tablet Time. A LOVES to watch YouTube videos on the tablet, usually before we tuck him in at night. So, we landed on a system where he gets 10 minutes if he's had a great day, 5 minutes if it was a good day, and he gets no Tablet Time if he made too many bad choices. Let's be honest, we certainly did not make this up, and there's no reason to reinvent the wheel, so we went with the standard stop light colors to make a chart for A to monitor his behavior with: green being great, yellow being ok, and red signifying a bad day.
I designed the circles on my computer, making the faces reflect the levels, and adding messages about what each level means - most importantly, we made the red face ask how A can make tomorrow a better day, since that's really the whole focus here.
I wanted A to feel invested in the chart, and identify with it as HIS, so I printed out a picture of him and attached it to a clothespin. Now, he has ownership - when he makes a bad choice, he has to move his clip down, and if he makes a good choice, he gets to enjoy moving it back up :)
So far, the chart has been working. When A has to move down, he even starts the conversation of how he can make better choices to move back up! Hopefully, he'll continue to ask those questions, and be receptive to those conversations, so he can begin to use his words rather than tantrums.
The majority of the time, A is a sweet, loving, intelligent, funny little guy. He feels his emotions deeply, which is awesome when he's telling us how much he loves us, or how excited he is to visit his cousins... but it's intense when he's frustrated, mad, or hurt. He tends to go straight to kicking/stomping, whining, and crying, without using his words at all. In addition, within the last month or so, he's started a bad habit of back-talking us, AND his teachers! We try to discuss it with him, and that slowly sinks in (I hope), but we definitely decided we needed some tangible consequences to help him learn.
We went with Tablet Time. A LOVES to watch YouTube videos on the tablet, usually before we tuck him in at night. So, we landed on a system where he gets 10 minutes if he's had a great day, 5 minutes if it was a good day, and he gets no Tablet Time if he made too many bad choices. Let's be honest, we certainly did not make this up, and there's no reason to reinvent the wheel, so we went with the standard stop light colors to make a chart for A to monitor his behavior with: green being great, yellow being ok, and red signifying a bad day.
I designed the circles on my computer, making the faces reflect the levels, and adding messages about what each level means - most importantly, we made the red face ask how A can make tomorrow a better day, since that's really the whole focus here.
I wanted A to feel invested in the chart, and identify with it as HIS, so I printed out a picture of him and attached it to a clothespin. Now, he has ownership - when he makes a bad choice, he has to move his clip down, and if he makes a good choice, he gets to enjoy moving it back up :)
So far, the chart has been working. When A has to move down, he even starts the conversation of how he can make better choices to move back up! Hopefully, he'll continue to ask those questions, and be receptive to those conversations, so he can begin to use his words rather than tantrums.
Friday, August 11, 2017
My First-Ever Afghan!
I've been a crocheter for about 12 years now, but in all that time, I've never made an adult-sized blanket - I've made LOTS of baby blankets and other projects like hats, mittens, toys, etc. But the idea of a full-sized blanket was quite intimidating. And, quite frankly, I worried I wouldn't have the patience to focus on one project for the amount of time it would require.
I'm not sure what exactly made me change my mind, but when an old friend of mine got engaged, I decided I wanted to make an afghan for her wedding present. I've always enjoyed making baby blankets for any friends & family who have kids [seriously, it takes, like, 3 seconds after my exclamation of delight before I'm picking stitches and browsing for yarns...] but this was my first-ever wedding project. Luckily, the gal I made this for is a sweet, loving, genuine-hearted person who I know will appreciate a handmade item, so it was a good time for my first attempt ;)
Happy Wedding, Addie & Peter!
I was already nervous about my time management when it comes to crocheting, so I selected a variegated yarn, to give the blanket visual interest without adding the hassle of changing colors and weaving in extra ends. This is "watercolor" by Red Heart, and I totally love it! I had some left over, so I think I might make pillows for my couch at work ;) I kept it simple, yet gave the blanket some texture, by working in a 3dc crossover pattern:
- chain a multiple of 4 + 2, plus 1 extra for the starting chain (I did 163)
- Row 1: sc in the 2nd chain from the hook and across, chain 2 & turn (this gave me 162 sc)
- Row 2: dc in the first stitch - doing this on either end of the pattern rows will give a nice, even edge to the project. Skip the next st, then dc in each of the following 3 stitches. Then, dc into the stitch you skipped - this will stretch the working yarn across the 3 you just made, creating the dc crossover pattern. Continue across the whole row, following the *skip the next st, dc in each of the following 3 stitches, then dc into the stitch you skipped.* Dc in the last stitch, ch 1 & turn. (160 pattern stitches + 1 dc on each side = 162 stitches)
- Row 3: sc in each st across, ch 2 & turn
- Row 4: dc, *skip 1 st, dc in next 3, dc in skipped stitch* across, dc in last stitch
- Repeat rows 3 & 4 for the remainder of the project, being sure to end on an sc row, for a clean border
When I was done crocheting, weaving in the ends, and blocking the project, I added my last little touch: a personalized label I put on all of my pieces. All in all, I'm SUPER excited to have finished a whole afghan, and I'm already dreaming about all the couches & beds I can make cozy blankets for... ;)
Subscribe to:
Posts (Atom)